Tenant Configuration
Once you have access to the Go Connect Server in the Master Admin mode and have established connection to a PBX, you can now add and configure a new tenant.
NOTE: It is necessary to add a "Tenant" license for each additional customer tenant.
Note 2: The first Tenant license will be consumed by the "(Master Tenant)" itself.
Note 3: Users who have not been assigned to a tenant will see the type "(None)" listed against their user under the Tenant heading. Users without an allocated tenant will not be able to log in. The (None) tenant type means that a Site, extension or user is not assigned to a specific tenant.
Note 4: If a Site is not configured to be part of a specific Tenant, when extensions are downloaded from the PBX they will default to the (None) tenant type until assigned to a tenant.
- To configure a Tenant and allocate user license, go to the Enterprise tab -> Tenants -> and click on "Add".
Tenant Tab
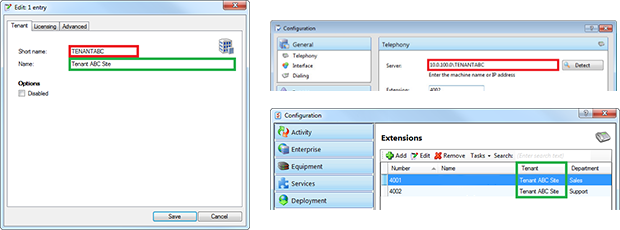
a) Type in the tenant's Short name (this is the unique tenant server login address which will be entered in the client software), and its (full) Name to be displayed under the Tenant column on all relevant Go Connect Server configuration screens.
Licensing Tab
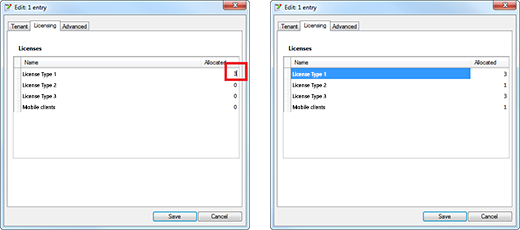
b) Each tenant can be allocated a maximum of licenses that can be used by license type by editing the field under the "Allocated" column. The total number of licenses allocated across all tenants cannot exceed the total number of licenses available on the server. Not all licenses need to be allocated and licenses can be moved easily from tenant to tenant.
- To configure a Security Policy for a Tenant, go to the Enterprise tab -> Security Policies -> and either click on "Add" or amend the policy that was auto created when the tenant was created.
When creating a new policy, type in an appropriate name for the Policy and assign it to the tenant. Enable/Disable Options as appropriate.
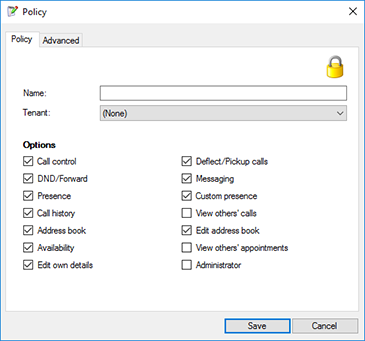
NOTE: It is recommended you have a Tenant Admin and a Tenant Client/User policy for each Tenant. - Only the Master Admin can configure and allocate users and extensions (devices) to each appropriate tenant.
To do this:
a) To configure a user, go to the Enterprise tab -> Users -> click on "Add", enter user details and from the "Tenant:" dropdown menu choose the appropriate tenant and click "Save".
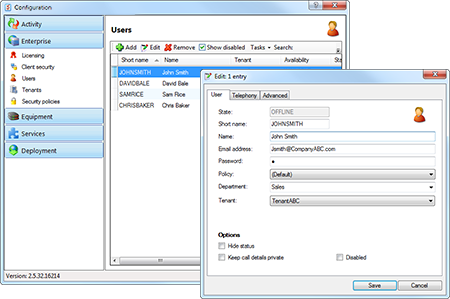
b) To configure an extension, go to the Equipment tab -> Extensions -> "select preferred device" and click on "Edit", from the "Tenant:" dropdown menu choose the appropriate tenant and click "Save".
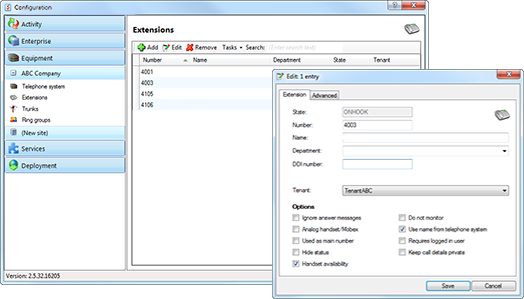
c) To configure a mobile handset, go to the Deployment -> Mobile handsets -> "select preferred Mobile handset" and click on "Edit", from the "Tenant:" dropdown menu choose the appropriate tenant and click "Save".
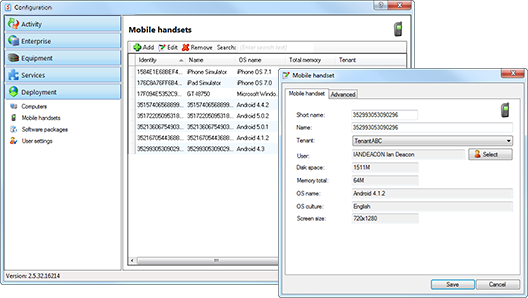
When configuring and establishing connection with multiple PBXs, on the multi-tenanted server, it is necessary to add an "Additional PBX" licence for each additional PBX connection.
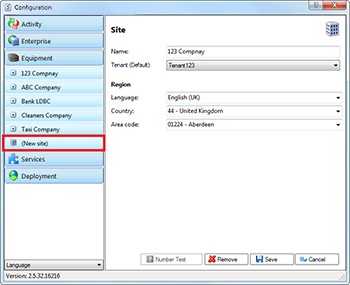
The "(New site)" page under Equipment tab allows the addition of extra sites.
To configure a new site, system administrator will have to provide:
- Site Name
- Assign a Tenant*, but only if you want to automatically associate every device on that Site with that one specific tenant, otherwise leave it as "(None)".
- Region information: Language, Country code, Area code (if the site happens to be in a different time zone, the system will calculate this from the Country and Area Code).
* Please note: Changing this field subsequent to initial set up will not re-assign users and extensions to the new tenant name. Users and extensions would need to be re-assigned using the normal user and extension configuration screens.

 Report this page